With Christmas looming, it is always a good idea to see what we can make in the way of Christmas presents.
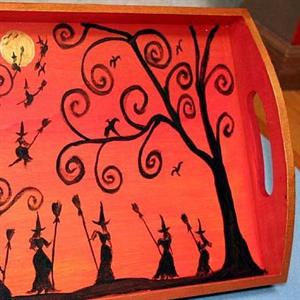
Painting a wooden tray
Requirements
• Wooden tray
• Acrylic paint - your choice of colours
• Small paint brushes
• Sand paper
• Design to be used
• Pencil
• Water-based varnish - this is suitable to use with an acrylic paint
Method
Sand your tray down, getting a good, smooth finish to paint on. Trace your design onto the tray, being careful to place it in an interesting position. A simple design such as poppies, are easiest to paint. Add the colours neatly, painting in all the details.
Once dry, outline the design using a black paint and a very fine paint brush. A fine liner could also be used. Leave your tray to dry very well, than add about 3 coats of varnish to it.
If preferred, your tray can also be sanded lightly, and then painted in a solid colour.
Look to see what would complement your design as a background colour. For instance, a cream background would look nice with red poppies. Then trace on your design, and paint it. Once completely dry, it can be varnished, using at least three coats to do so.
Building a window box
Find fun things to make that can be passed on to someone close to you. This box is fairly simple to make, and an ideal gift even for a boy to make for his Mom!
Requirements
• Wood, such as pine - 530mm x 100mm x 12 mm
• Strip of wood - 1280mm x 30mm x 12mm
• 12 bullet head nails, 25mm long
• Varnish or paint, as preferred
• Pencil, ruler
• Sandpaper
• Masking tape
• Drill and 2mm bit
• Hammer, handsaw
Method
Cut the 100mm x 12mm wood into a 300mm length for the base, and two 115mm lengths, for the two ends. Then cut the strip of wood into four lengths of 320mm, each. Sand the wood. Drill 2 holes in each of the end pieces, 20mm from the bottom and 10mm from each side.
Nail the ends on. The end pieces will protrude to form the legs. Position a strip of wood on either side or the box, level with the tops of the ends.
Drill a hole at each end of the strips, then hammer in the nails, to attach the strips. In the same way, nail the next strip below this strip, allowing about 15mm between them.
Sand the box down, then paint your box, or varnish it, at least twice.
Your window box is now complete - and can be given just as it is, or it could look really lovely given away with 3 small pot plants in it! This is also a lovely idea for starting your own herb garden.
Flower seeds in brown paper packets
So now that we know how to make a window box to grow pot plants in, it time to learn how to decorate packets to contain seeds that could be given with the window box.
Requirements
• Small paper bags, approximately 15mm x 12mm
• Clear craft glue
• Fine paint brushes
• Acrylic paints
• Flower seeds - possibly from your own garden
• Ribbon 5mm wide
• Pencil, ruler
• Paper punch
Method
Fold the tops of the packets over to 5cm flaps to the back. Using the paper punch, make 2 holes approximately 2cm from the top of the packet. On the fronts of the packets, make designs and paint them according to the type of seed that packet will hold.
Below your painting, write in the name of the seed in that packet. Place the seeds in your packet, and using just a little glue, glue the flap down. Then using the ribbon, thread it through the holes in the top of the packet, and tie a bow in the front of the packet.
Don’t forget to send me all the photos you have of what you have made, over the past year. Send these to [email protected], and remember, keep on crafting!
.jpg)
Jenny Ter Morshuizen